


Useful Information

This section answers common pilot questions and contains handy tips and knowledge that will assist you in using your hardware.
It is recommended that all pilots browse this section.

Familiarise yourself with MobiFlight
All users will benefit from learning the basics.
The official doumentation gives the best overview of the main MobiFlight window.
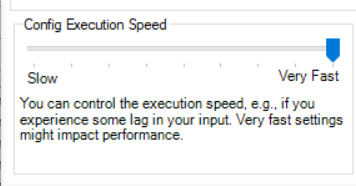
Speeding up the Displays
The refresh rate of the numeric displays is controlled by the Config Execution Speed. Increasing this to maximum should be OK on most PCs.
If you notice any unusual panel behaviour (skipping inputs, LEDs out of sync), the setting should be dropped down a notch.
Red Exclamation Mark (Precondition Not Satisfied)
After hitting 'Run', many users see a red exclamation mark on the MobiFlight window and think that something has gone wrong. Hovering your mouse pointer over the warning shows the text “Precondition Not Satisfied”.

Don't worry, this is the correct behaviour!
Many functions have Preconditions attached, meaning they are only active if a switch is in a certain position.
In the image above, the Inches of Mercury (INHG) Barometer display has a red warning 'Precondition Not Satisfied'.
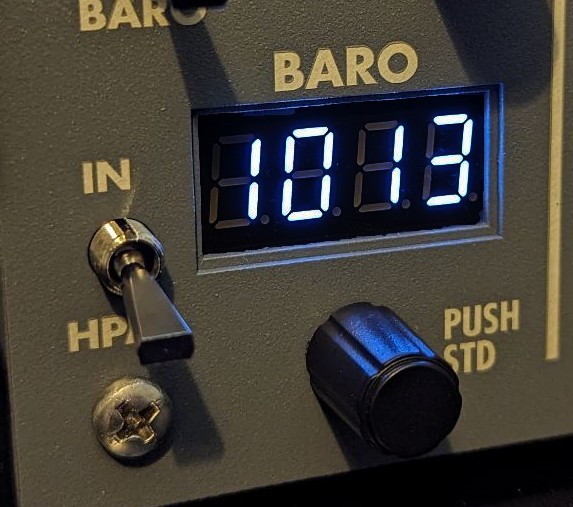
As can be seen, the selector switch is in the HPA (metric) position, therefore the Inches of Mercury function is inactive. Its precondition is not satisfied.
Radio owners will see many such instances. Because the Radio is a 2-in-1 product, when System 1 is active all the System 2 functions will show Precondition Not Satisfied, and vice-versa.
MobiFlight Logging
MobiFlight can optionally display a live feed of what it's doing. This can assist with troubleshooting, support, and is useful when developing new profiles.
The output is also saved in a file called log.txt, located in the MobiFlight installation directory.

To enable Logging mode, tick the box on the settings page. Different log levels are available but Info is recommended for performance reasons.

Displays Brightness
The brightness of the displays can be adjusted as follows:
Radio: Push the COM knobs to adjust on-the-fly. The default brightness is 3, but this can be altered with the RADIO BRIGHTNESS function on the Output tab in MobiFlight. Under “Modify” alter the 3 in the formula to a different number.
Autopilot: The default brightness is 3 and can be altered using the same method as above, except the function is called AP BRIGHTNESS. There is no 'on-the-fly' method
MobiFlight Modules Window
The MobiFlight Modules window displays useful information about your connected devices
It also allows you to update the device's firmware
Do not attempt to alter your device's firmware except on the advice of Circuit Avionics
It is accessed by the MobiFlight Modules button:

The window is shown below, with some features highlighted:
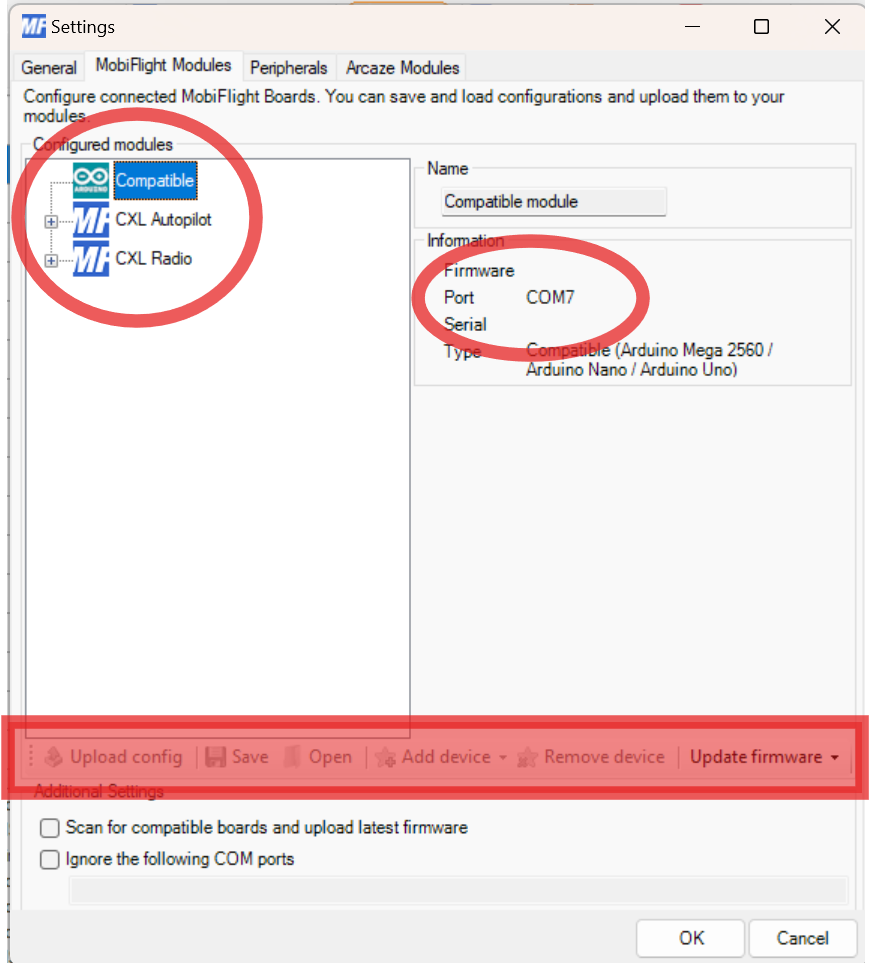
Caution: The shaded red area relates to Firmware updates. Do NOT click any buttons unless instructed to do so!
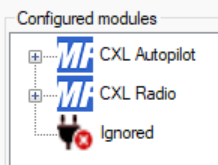
Configured Modules: Any devices with an Arduino-based control board will be shown here - this includes unrelated devices such as 3D printers, third-party flight simulator hardware (yokes, tillers, displays), and others.
Circuit Avionics devices appear as CXL Autopilot or CXL Radio. Third-party devices appear as Compatible.
Port: When you plug in a device, a virtual serial port is created for that device. These virtual ports are numbered COM1, COM2, COM3, etc.
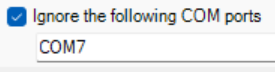
Recommended: Right-click and select "Ignore COM Port" for any third-party "Compatible" devices - this will prevent MobiFlight from having any interaction with that COM port. Note that plugging that device into a different USB port on your PC will assign a different COM port number, and you'll have to ignore it again.
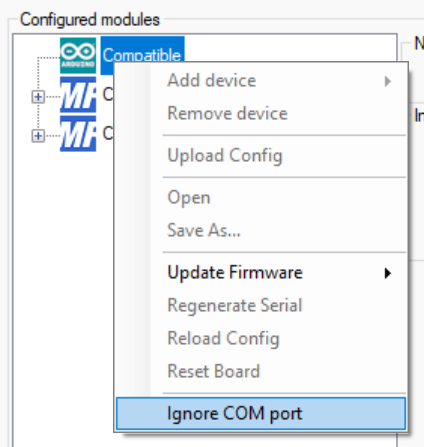
This shows a third-party device, assigned to COM7, has been ignored
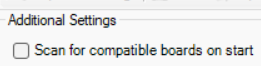
Recommended: The box shown below should be unticked
This prevents MobiFlight prompting to override the firmware on third party devices
Disused Controls
It might be that you only fly one aircraft type and that you therefore have no need for some of the functions on your hardware.
Autopilot owners might not make use of Autothrottle, Flight Director 2 and Autopilot 2. Radio owners might not need ADF2, since many aircraft don’t have these installed.
In these cases you are free to reprogram the switches, displays and corresponding LEDs to suit your own needs. See You Have Control for more information.
Auto-Load and Auto-Run your Aircraft Profiles
Instead of manually loading and running your profiles, you can have the program do it automatically. It detects which aircraft is active, then loads a profile you've linked to that aircraft.
These two related features are documented on the official documentation (search 'Autorun' and 'Aircraft Profile Status')
AutoRun minimises the MobiFlight window by default. In case this behaviour is not desired, untick the "Minimise to System Tray on Autorun" on MobiFlight Settings
MobiFlight HubHop Presets
MobiFlight will remind you each week to update your HubHop presets.
These presets are used for modifying or creating new MobiFlight profiles. More information on HubHop presets is given at You Have Control.
The reminders are safe to ignore if you’re just using a pre-made profile. You can disable the alert altogether through Extras -> Settings -> Check HubHop Presets on Application Start.
You can manually update HubHop presets at any time through Extras -> HubHop -> Download Latest Presets.
Expect Quirks!
If you’ve read You Have Control, you’ll realise that the home-cockpit environment is very much the wild west of Flight Simulation because there are big differences between the way each aircraft is programmed.
Flicking cockpit switches in the PMDG 737, for example, involves sending the number of the switch, and the direction it is moved, through to flight sim's Helicopter Rotor Brake input! This was a workaround that overcame the limitations of legacy simulators, and allowed PMDG to create their truly ground-breaking products back in the day. As each iteration of the 737 is built on the code base of the last, we arrive in the mid-2020s and still use the famous Helicoper Rotor Brake!
Each developer has their own techniques, and these manifest themselves in the way we create the functions in the aircraft Profiles. As a result, your hardware will operate differently depending on which aircraft you’re flying and which profile you have loaded.
Many of these quirks are pointed out on the Usage Notes accompanying each Profile.
Some things to watch out for:
Switches Sync
When you hit “Run” in MobiFlight, the program attempts to sync up the position of the aircraft switches with the physical switch on your hardware. Because of the way some aircraft are programmed, and therefore the way the function has been created, this ‘sync’ might not occur. It’s best practice to give your switches a quick once-over before or after hitting “Run”.
If you don’t want MobiFlight to attempt to sync the switches on ‘Run’, disable the option “Automatically perform the retrigger-action with run mode” on MobiFlight Settings.
CDU Functions
Some modern aircraft have moved functions that were traditionally performed by knobs and buttons over to the CDU (FMS). For example, if you’re flying a modern Airbus you’ll be entering your VOR and Course down on the MCDU, and your ILS will auto-tune. In these cases, you can still display the relevant information on your hardware. This all depends on the aircraft developer – the FlyByWire A32NX still allows you to use the radio knobs to tune the transponder code, whereas the real aircraft and most other addons do not.
Joysticks and other hardware can be run through MobiFlight
Joysticks can normally only access the functions available through the controller menu. Mobiflight detects their input and allows them to access and send rich information to internal variables and events. Set the device up as any other, using the information in You Have Control.
